Uber Eats Rejected My Photo
Here's How to Fix It
Uber Eats rejects menu photos every day for technical reasons, and the error messages rarely tell you what went wrong. This guide covers both failure points: photos that won't upload at all, and photos that upload fine but get removed after review. Find your symptom below and fix it in minutes.
- Check the 2026 Uber Eats photo specs in one box
- Match your symptom to the cause with the diagnosis table
- Fix the HEIC invalid-file-type error for good
- Clear background, text, and format issues in about 30 seconds
On this page
Uber Eats Photo Requirements (2026)
NOT Allowed:
- Text overlays
- Watermarks
- Prices
- Logos
- Stock photos
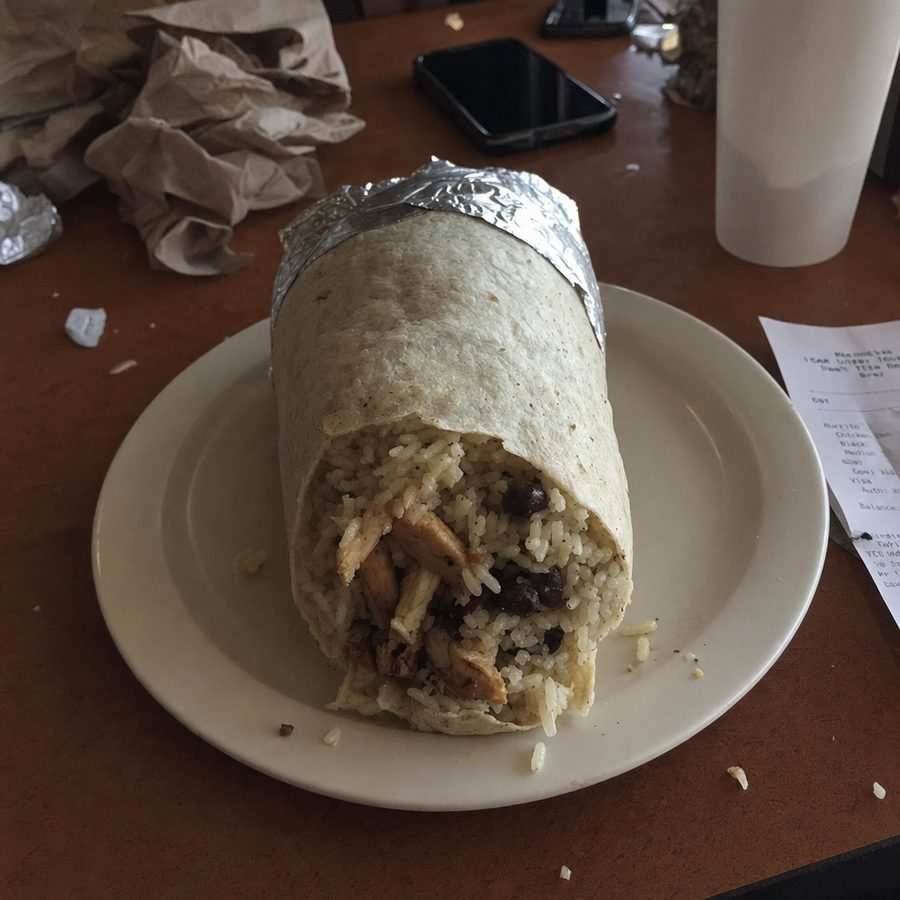
Before
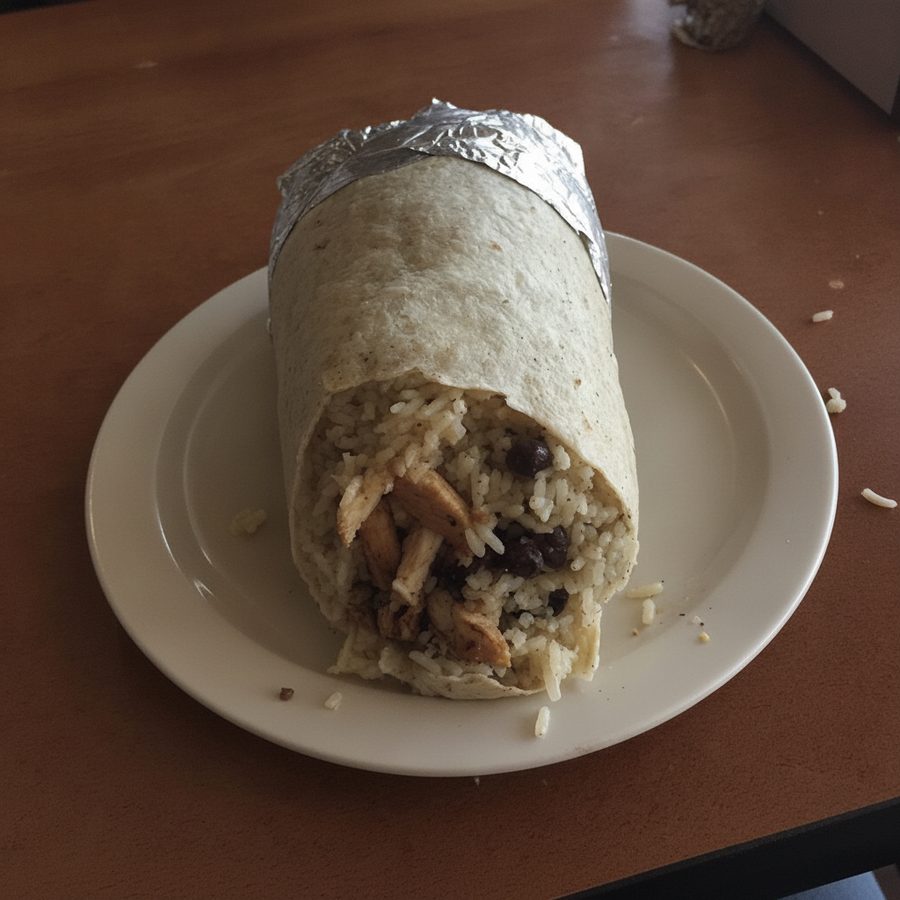
After
Quick Diagnosis: Match Your Symptom to the Cause
There are two different problems that both get called "rejection." The first happens instantly: the upload fails, spins forever, or throws an error like "invalid file type." That is a technical check, and it is almost always the file itself. The second happens later: the photo uploads fine, then disappears or gets flagged after Uber Eats reviews it. That is a content or quality decision. The fix depends on which one you hit.
| Symptom | Likely Cause | Fix |
|---|---|---|
| "Invalid file type" or "invalid photo type" error | HEIC file from an iPhone | Convert to JPG (see below) |
| Upload spins forever or fails silently | File too large or weak connection | Compress under 10MB, switch to Wi-Fi |
| Upload works on web but not in the app | App cache or outdated app version | Update the app, or use Uber Eats Manager on desktop |
| Photo uploaded, then removed days later | Failed content review | Check the rejection reasons below |
| "Image resolution too low" message | Screenshot or heavy crop | Reshoot with the camera app, don't crop hard |
"Invalid File Type": The HEIC Problem
This is the single most common reason Uber Eats won't let you upload a photo. Since iOS 11, iPhones save photos in HEIC format by default. HEIC is efficient for storage, but Uber Eats accepts JPG, PNG, and GIF, not HEIC. The upload form sees a file type it doesn't recognize and rejects it before the photo even reaches review. The confusing part: your phone shows the photo normally, so nothing looks wrong on your end.
You have two ways out. The quick fix converts the photo you already took. The permanent fix changes your camera settings so every future photo saves as JPG.
Android phones save JPG by default, so this error is rarer there. If you see it on Android, check whether the photo came from a messaging app (WhatsApp and others sometimes hand off WebP files) and re-export it as JPG.
Deep dive: why Uber Eats photo uploads fail covers the invalid file type error in full, including why renaming a file to .jpg does not convert it.
Fixing Failed or Stuck Uploads
If the format is right but the upload still fails, the problem is usually size, connection, or the tool you're uploading with. Work through these in order:
- 1
Check the file size
Uber Eats caps item photo uploads at 10MB (a separate 5MB limit applies only to the Creative Hub in Ads Manager). Photos straight from a modern phone camera can exceed this. Compress with your phone's editor, or resize slightly before uploading.
- 2
Switch to a stable connection
Restaurant Wi-Fi during service hours drops uploads constantly. Try again on a stronger network, or upload before opening.
- 3
Try the web portal instead of the app
Uber Eats Manager on a desktop browser is more reliable for photo uploads than the mobile app. If the app keeps failing, log in on a computer and upload there. Update the app if you want to keep using it.
- 4
Rename the file simply
Long file names with special characters occasionally break upload forms. Rename to something plain like burger.jpg and retry.
If the same photo fails on both the app and the web portal after these steps, the file itself is the problem. Re-export it fresh from your camera roll and start over.
Deep dive: Uber Eats photo upload not working works through the whole upload path in order, from file type and pixel limits to the Save and Request Approval steps that are easy to miss.
Why Did Uber Eats Reject My Photo?
Find your issue below. Click to expand for specific fix instructions.
Photo Too Small
Uber Eats requires at least 550x440 pixels. Most phone photos clear this easily, but screenshots, heavy crops, or images pulled from chat apps often don't.
AI can fix
Photo Too Small
Uber Eats requires at least 550x440 pixels. Most phone photos clear this easily, but screenshots, heavy crops, or images pulled from chat apps often don't.
1How to Check
On iPhone: Open photo > swipe up > see dimensions. On Android: Open in gallery > tap info/details.
2How to Fix
Reshoot with your phone camera (not a screenshot). Most modern phones shoot at 4032x3024 or higher; around 1200x900 is a comfortable target well above the floor.
AI Note: AI can upscale photos, but quality may suffer. Best to reshoot if possible.
Blurry or Low Quality
Motion blur, focus issues, or heavy compression. Uber Eats wants crisp, clear images.
Reshoot needed
Blurry or Low Quality
Motion blur, focus issues, or heavy compression. Uber Eats wants crisp, clear images.
1How to Check
Zoom in on the photo. If text or edges look fuzzy, it's likely too blurry.
2How to Fix
Tap to focus on the food before shooting. Hold your phone steady or prop it against something.
AI Note: AI cannot fix motion blur or focus issues. You'll need to reshoot.
Wrong Aspect Ratio
Uber Eats recommends a ratio between 5:4 and 6:4 for menu items. Tall portrait photos or extreme panoramic crops may be rejected.
AI can fix
Wrong Aspect Ratio
Uber Eats recommends a ratio between 5:4 and 6:4 for menu items. Tall portrait photos or extreme panoramic crops may be rejected.
1How to Check
Use our Platform Checker to see if your aspect ratio matches Uber Eats requirements.
2How to Fix
Shoot in landscape orientation. A phone's default 4:3 frame already sits inside the 5:4 to 6:4 band, so avoid cropping to a square or a very wide strip.
AI Note: AI can intelligently extend your image to achieve the correct aspect ratio.
Text or Logos in Image
Price tags, text overlays, watermarks, or business logos in the food photo.
AI can fix
Text or Logos in Image
Price tags, text overlays, watermarks, or business logos in the food photo.
1How to Check
Look closely at your image for any text, prices, or logos, including small print on napkins or packaging.
2How to Fix
Reshoot without text elements, or crop them out if they're at the edges.
AI Note: AI can remove text and logos, filling in the background naturally.
Inappropriate Background
Clutter, personal items, other brands, or unprofessional surfaces visible.
AI can fix
Inappropriate Background
Clutter, personal items, other brands, or unprofessional surfaces visible.
1How to Check
Look at everything around your food: dishes, receipts, other menus, personal items.
2How to Fix
Clear the area before shooting. Use a clean plate on a simple surface.
AI Note: AI can replace backgrounds with clean, professional surfaces.
Wrong File Format
Uber Eats accepts JPG, PNG, and GIF. HEIC (iPhone default), WebP, or other formats fail the upload check.
AI can fix
Wrong File Format
Uber Eats accepts JPG, PNG, and GIF. HEIC (iPhone default), WebP, or other formats fail the upload check.
1How to Check
Check your file name extension. iPhones often save as .HEIC by default.
2How to Fix
Convert to JPG before uploading. iPhone: Settings > Camera > Formats > Most Compatible.
AI Note: MenuCapture automatically outputs JPG format that works on all platforms.
Doesn't Match Actual Food
Stock photos, AI-generated images, or photos that look nothing like what you serve.
Reshoot needed
Doesn't Match Actual Food
Stock photos, AI-generated images, or photos that look nothing like what you serve.
1How to Check
Does the photo accurately represent the dish as it's actually served?
2How to Fix
Use real photos of your actual food. Edited photos are fine, fake photos are not.
AI Note: Only use AI for editing real photos, not generating fake food images for listings.
File Size Too Large
Uber Eats has a maximum file size of 10MB. High-resolution photos may exceed this.
AI can fix
File Size Too Large
Uber Eats has a maximum file size of 10MB. High-resolution photos may exceed this.
1How to Check
Check file size in your photo details. iPhones show this when you swipe up on a photo.
2How to Fix
Compress the image using your phone's built-in editor or an online tool.
AI Note: MenuCapture optimizes file size while maintaining quality.
Quick Fix Guide
| Problem | Solution | Time |
|---|---|---|
| Photo is slightly too small | Reshoot, don't upscale | 2 min |
| Wrong format (HEIC) | Convert to JPG or change iPhone settings | 30 sec |
| Distracting background | Use AI to replace background | 30 sec |
| Text/watermark visible | Crop out or use AI removal | 30 sec |
| File size too large | Compress with phone editor | 30 sec |
Fix Most Issues in 30 Seconds
Don't want to reshoot? MenuCapture can fix many common rejection reasons automatically:
What AI Can Fix
- Extend to correct aspect ratio
- Remove text and watermarks
- Replace distracting backgrounds
- Correct lighting and colors
- Optimize file size and format
What Needs a Reshoot
- Blurry/out of focus photos
- Motion blur from camera shake
- Very low resolution originals
- Food that doesn't look appetizing
- Heavy compression artifacts
Avoid Future Rejections
- 1
Change iPhone to save as JPG
Settings → Camera → Formats → Most Compatible. Prevents HEIC issues.
- 2
Shoot in landscape orientation
Turn your phone sideways. The default 4:3 landscape frame lands inside Uber Eats' recommended 5:4 to 6:4 band.
- 3
Use the Platform Checker before uploading
Our free tool checks dimensions, file size, and format before you upload to Uber Eats.
- 4
Clean your background
Remove menus, receipts, personal items. Simple backgrounds work best.
Rejections are cheaper to prevent than to fix. Our full Uber Eats photography guide covers every size, framing rule, and content requirement in one place, so you can shoot a whole menu that passes review the first time. If you're shooting on a phone, the smartphone menu photography guide walks through the camera settings that matter.
Frequently asked questions
Typically 24-48 hours, though it can take up to 5 business days during busy periods. Make sure your photo meets all requirements before re-uploading to avoid another rejection.
Uber Eats' automated system checks multiple requirements at once and often gives generic rejection messages. Use our Platform Checker to diagnose the specific issue with your photo.
No. Uber Eats requires photos of your actual food. AI-generated or stock images that don't represent what you actually serve can get your account flagged or suspended. Only use AI for editing real photos.
Almost always because the file is HEIC, the default format iPhones have used since iOS 11. Uber Eats accepts JPG, PNG, and GIF, not HEIC. Convert the photo to JPG, or change your iPhone camera to save JPG permanently: Settings, then Camera, then Formats, then Most Compatible.
The web portal. Uber Eats Manager in a desktop browser handles photo uploads more reliably than the mobile app, especially for multiple photos at once. If an upload keeps failing in the app, trying the same file on desktop is the fastest way to rule out an app problem.
Beyond technical requirements, Uber Eats also reviews for quality and food presentation. Issues like poor lighting, unappealing presentation, or backgrounds that distract from the food can cause rejections even if dimensions and file size are correct.
Keep reading
Fix an Uber Eats Photo Upload That Fails
Invalid file type errors, size and dimension limits, stuck uploads, and the Uber Eats Manager upload flow.
Uber Eats Photo Requirements
Exact Uber Eats item and cover photo specs and the reasons photos get rejected.
Fix a Rejected DoorDash Photo
Walk through the common DoorDash rejection reasons and how to correct each one.
Fix Blurry Menu Photos
Why menu photos come out blurry and how to sharpen them.
Don't Let Rejected Photos Slow Down Your Business
Every day your photo is rejected is a day without that menu item visible to customers. Fix it now and get back to selling.
Fix My Rejected Photo