How to Fix Dark Food Photos
(Before Your Orders Drop)
Your food looks delicious in person but terrible in photos. Restaurant lighting is usually to blame. Here's why it happens and how to fix it in 30 seconds.
- See why restaurant lighting leaves dishes dark and flat
- Set up free side window light that beats a lighting kit
- Use exposure compensation and lift shadows without clipping highlights
- Know when AI can brighten a shot and when to reshoot
On this page
Why Your Food Photos Look Dark
The real problem: Restaurant owners spend thousands on interior lighting that creates atmosphere. That same lighting makes your menu photos look like they were taken in a cave.
There's a second trap hiding in most dining rooms: the light comes almost entirely from overhead. Even when it's bright enough, overhead-only light falls straight down onto the plate, filling every bowl and burger with hard shadows while the top edges glare. Food photographed this way looks flat and heavy at the same time. The fix is not more overhead light. It's light from the side, which is exactly what a window gives you.
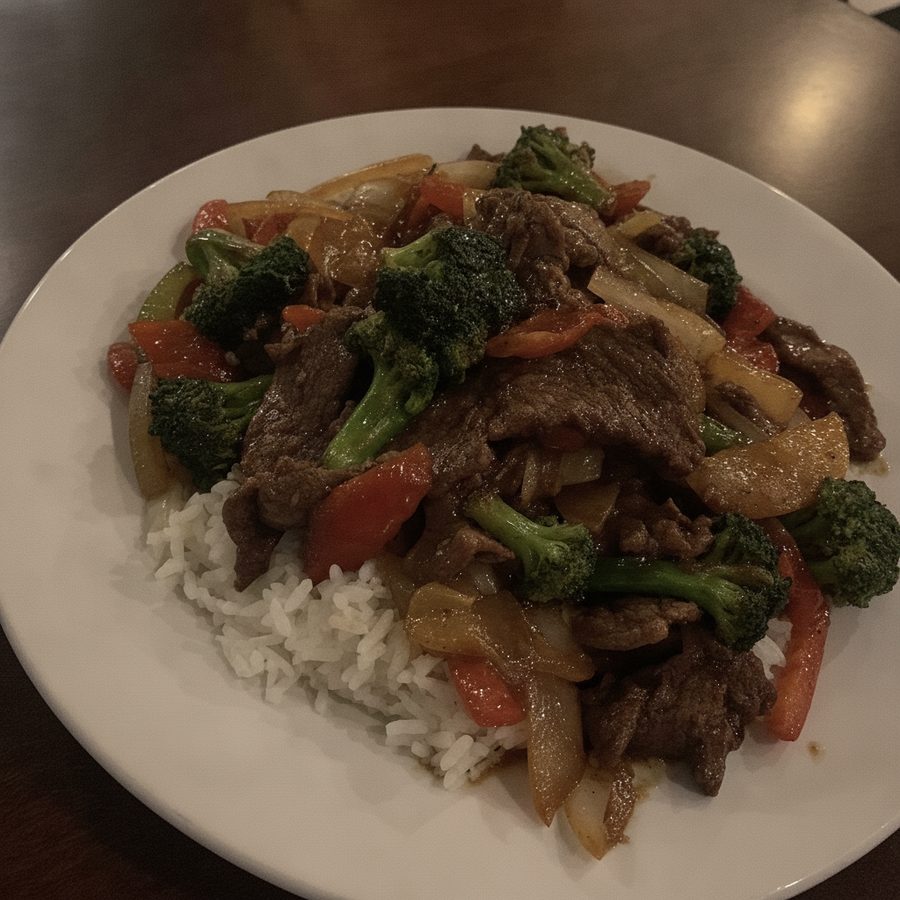
Before
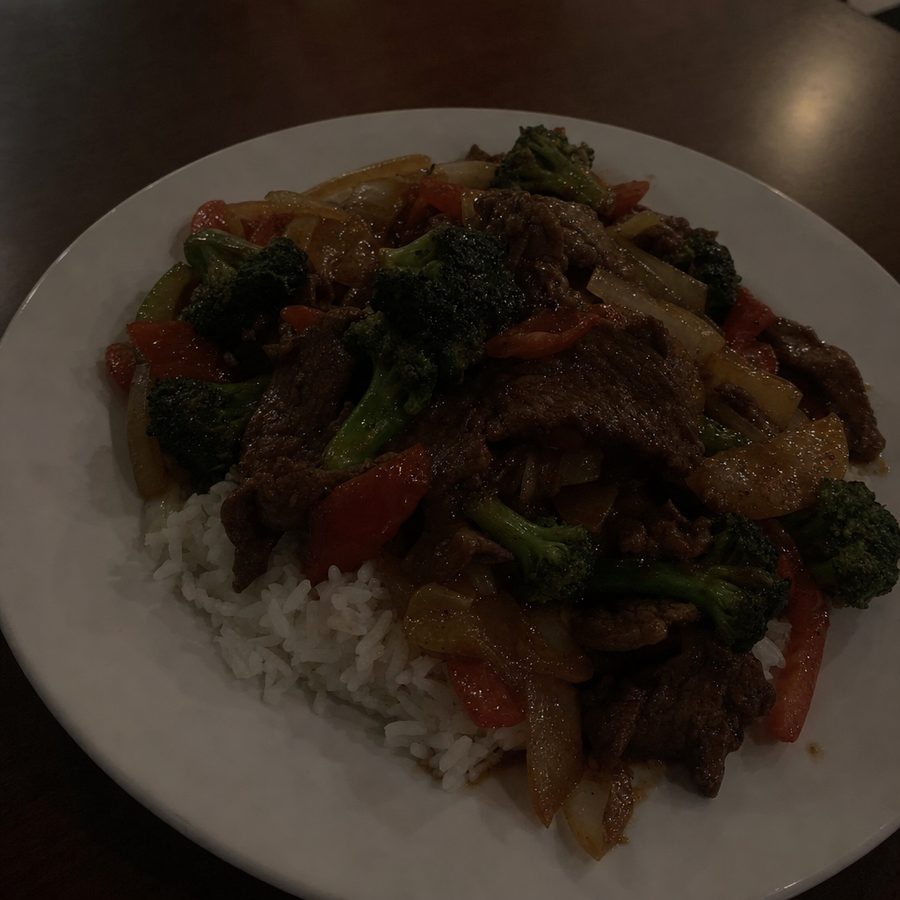
After
The Window Light Setup (Free and Better Than Gear)
One window replaces a lighting kit if you use it right. Pick a table beside the largest window you have and place the plate so the light hits it from the side or from slightly behind, not from directly in front. Side light skims across the food and shows texture: the char on a burger patty, the gloss on a sauce, the crisp edge of a fry. Front light flattens all of it.
Avoid direct sun. A bright patch of sunlight on the table creates the same harsh shadows as a flash. You want the soft, even light of an overcast day or a window that doesn't face the sun. If the sun is streaming in, a thin white curtain or even a sheet of baking paper taped to the glass turns it into a giant diffuser.
The shadow side of the plate will look dark. Bounce light back into it with a reflector, which sounds like gear but isn't: a piece of white foam board from a dollar store, a white menu, or a large white napkin propped upright on the shadow side does the job. Move it closer for brighter shadows, further for more contrast.
If moving the food to a window is genuinely impossible, that's when a cheap daylight LED panel or ring light earns its place. For a deeper walkthrough of lighting choices, our blog covers food photography lighting and continuous lighting setups in detail.
Exposure Compensation: The Slider Most People Never Touch
Your phone decides how bright a photo should be by averaging the whole scene. A white plate on a dark wood table confuses it: the camera sees a lot of dark and a little bright, splits the difference, and delivers a photo where the plate glows and the food sits in murk. Exposure compensation lets you override that decision before you shoot, which beats rescuing the photo afterward.
The goal is to expose for the food, accepting that the background may go a little dark. A slightly moody background is fine. Food you can't see is not. More phone technique like this, including AE/AF lock and gridlines, is in the smartphone menu photography guide.
Brightening a Photo Without Blowing the Highlights
The instinct with a dark photo is to drag the brightness slider right until the food appears. The result is usually worse than the original: the shadows come up, but the plate, any glossy sauce, and every bright reflection blow out to pure white with no detail. Blown highlights read as cheap and cannot be recovered, so brighten selectively instead.
- Raise Shadows first, not Brightness. The Shadows slider lifts only the dark areas where your food is hiding, leaving the bright plate alone.
- Pull Highlights down. If the plate or sauce is already glaring, a negative highlights adjustment recovers detail there while you brighten everything else.
- Use Exposure in small steps. If the whole photo needs lifting, move exposure a little, then rebalance shadows and highlights around it.
- Check the white areas last. If a white plate has turned into a featureless shape, you've gone too far. Back off until you can see the plate's surface again.
This is exactly the balancing act AI enhancement automates. Instead of juggling four sliders per photo, MenuCapture lifts the food, protects the highlights, and keeps colors natural in one pass, and does it identically across your whole menu so every dish matches.
DIY Fixes (Try These First)
Before you reach for AI tools, try these quick fixes. They cost nothing and can make a real difference.
AI Fix: 30 Seconds, No Setup
DIY fixes work, but they take time and don't always produce consistent results. AI-powered editing is different. Upload your dark photo, get back a properly lit version in 30 seconds.
Why AI works better than phone editors:
- Understands food photography specifically
- Preserves natural shadows and depth
- Corrects color casts from warm lighting
- Maintains texture and detail
- Consistent results across all your photos
When You Should Just Reshoot
Rule of thumb: If you can clearly see the food's texture and shape, AI can brighten it. If it's a blurry dark blob, reshoot with better conditions.
Frequently asked questions
Yes. AI trained on food photography understands how to brighten while preserving natural shadows, highlights, and colors. It's not just cranking up the brightness slider. It is intelligently adjusting exposure based on what's in the image.
Natural light from a window costs nothing. If that's not possible, a $15-25 clip-on ring light from Amazon is the next best investment. Place it at a 45-degree angle above the food for soft, even lighting.
No. Brightness and color correction are standard photo editing. Platforms only reject photos with heavy filters, text overlays, or images that misrepresent the actual food.
Usually because the light is all overhead, or because the camera exposed for the brightest thing in frame, often a white plate or a window behind the table. Overhead light fills dishes with shadows, and auto-exposure protects highlights at the food's expense. Move the plate so light comes from the side, tap the food to focus, and raise the exposure slider until the dish itself looks right.
Use our free Platform Checker tool. Upload your photo and see if it meets the quality requirements for Uber Eats, DoorDash, and other platforms.
Keep reading
Fix Blurry Menu Photos
Why menu photos come out blurry and how to sharpen them.
Fix Yellow Food Photos
Correct the yellow color cast from indoor restaurant lighting.
Smartphone Menu Photography
Shoot menu-ready dish photos with a phone you already own.
Food Photography Lighting
Lighting for real restaurant conditions: windows, dim dining rooms, and warm bulbs.
Stop Losing Orders to Dark Photos
Customers scroll past dark, uninviting food photos. Upload your photo to MenuCapture and get back a bright, appetizing version that drives orders.
Fix Your Dark Photo